Getting Ready to Code our SwiftUI App: First Steps
Before we start coding, it’s important to do some preparation:
📚 Understand the basics
Look at Apple’s guidelines and technical documents. This helps you understand what you can and can’t do. It also shows if Apple has frameworks (like AVFoundation) that make your idea easier to build.
Check this link to start using Apple’s Documentation.
🎨 Make a Simple Design
Create a basic version of your app using tools like Figma, Sketch or even by hand. This helps you see how your app might look and work before you build the whole thing.
It’s a bad idea to start coding without having a clear concept of what you want to achieve in your UI. You can see my example 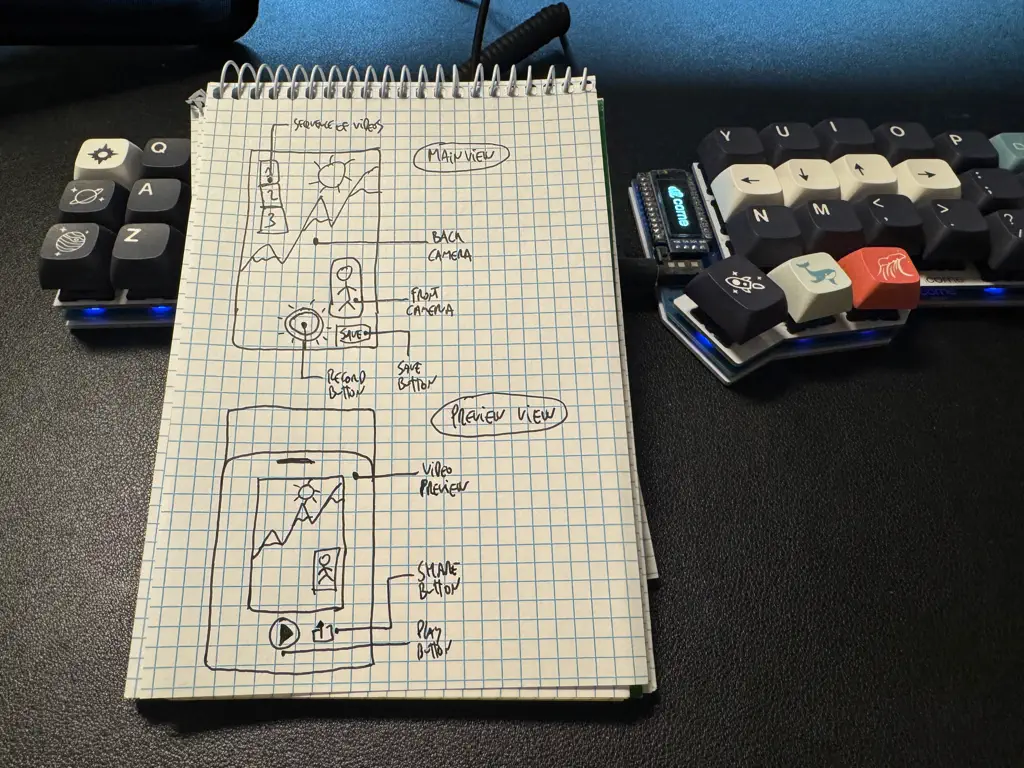
💬 Ask for Opinions
Show your app design to other people and ask what they think. Their feedback can help you improve your app before you spend more time and money on it

You can add more steps that you think are important for your project, but let’s keep it simple for now.
Next Steps: Researching Apple’s Frameworks
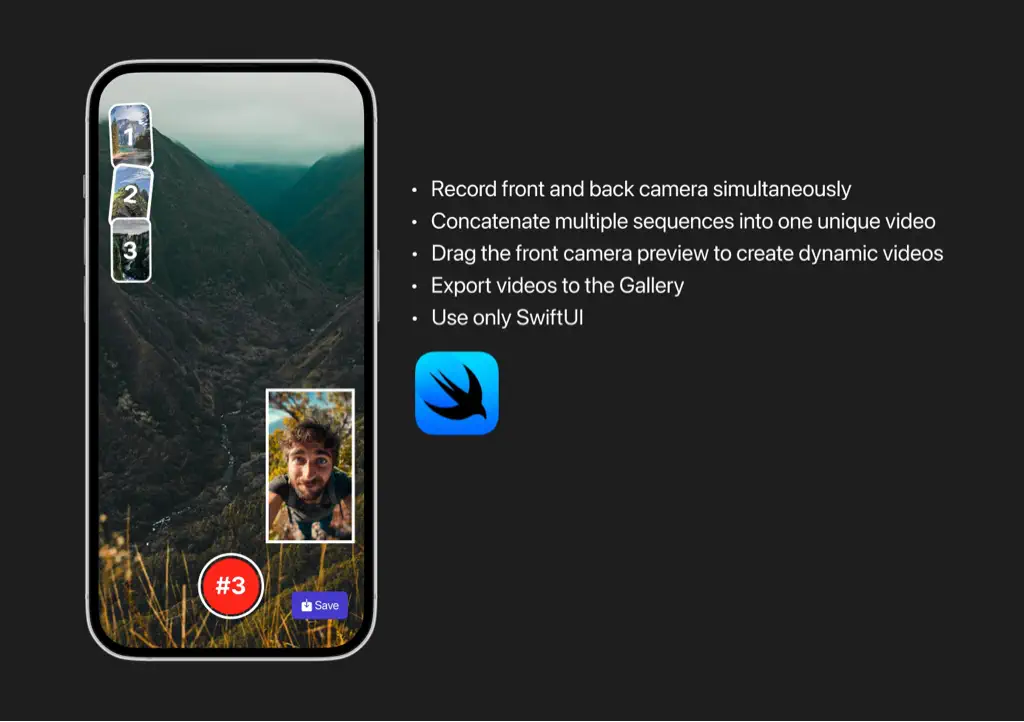
Apple’s documentation is great you can find a lot of valuable information. In my case I want to create a SwiftUI app able to record front and back cameras simultaneously, so you can start looking for Swift frameworks that works with Video, one example is AVFoundation, this Apple’s framework manage and manipulate audiovisual content, control camera functionalities, handle audio processing, and configure audio interactions within the system. Inside this framework you have a lot of classes and methods that can help you to achieve your goal (this is a perfect fit for my future app).
Also, inside Apple’s documentation you can find demo projects ready to be compiled in your simulator o even your real device. I found 2 of them that are worth to take a look:
I will check them and I will check the code to see how they manage the camera functionalities. I’ll share my findings in the next post. Stay tuned! 🚀